MOPO - Modify POs
|
Overview
Report Open POs Setups - Vendor inventory accounts |
Videos
Modify a PO Part Number Xrefs |
Overview
The basic order of things in MOPO is- Customer Invoice#
- Price
- Receive the Parts
- Vendor Information
...or, just GO FAST!
1. Customer Invoice#
 Press F2 to detail the line.
 If the invoice# is not on the PO, you can find it by pressing F9 to display parts sales for this part number.
 Select the invoice and press F3.
 MOPO imports the invoice information.
You can press F2 to see pricing detail from the invoice...
2. Price
 ...and import it...
or type in the purchase order price.
3. Receive the Parts
 Press F5 to "Emergency Receipt" the parts.
 If there is more than one part, you will be prompted to select which parts to receive.
 Enter the Vendor Invoice Number
 MOPO prompts for the invoice date with today as default.
Use the + and - keys to adjust the invoice date.
4. Vendor Information
 MOPO switches to the lower half of the screen for the Vendor information.
Most of the information here defaults correctly, and you just have to press ENTER through it.
You can press F2 to view the customer invoice here...
 ...and select and paste the costs.
Again, most of the information here defaults correctly according to the setups, and you just have to press ENTER through it.
Print the PO.
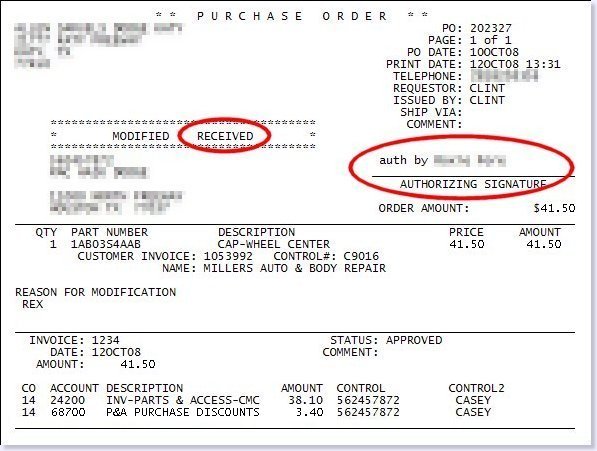
The printed PO is similar to ADP's, but indicates the emergency receipt, and an "auth by" printed signature if the non-inventory accounting is within the setup requirements.
How to go FAST!
 Here's the real power of MOPO. Press the F key for a shortcut.
Enter the Vendor Invoice number...
Here's the real power of MOPO. Press the F key for a shortcut.
Enter the Vendor Invoice number...
 ...and the Invoice Date
and you're done.
MOPO calculates the accounting according to your setups.
The PO prints.